Showing posts with label dolly. Show all posts

Sunday, October 21, 2018

Cute Brown Cat +Sexy Black Cat Filter Makeup~


A few years back, right before I had my new set up, I did a cute and easy cat makeup for a quick last minute Halloween look which I absolutely adored!


I really wanted to repeat it again this year and also share a mini tutorial on how I put together the look.

Products needed for eyes:

Primer (for longevity of the look)
Eyeshadow in colours; cream, warm brown, dark brown, black (preferably matte)
Eyeliner of choice (I use liquid eyeliner in brown)

Products for cat filters:

Brown Cat; taupe eyeliner + dark brown eyeliner

Black Cat; black eyeliner + black liquid eyeliner
(optional dark lipstick or lip gloss)


To create a cat filter effect, I found it helps to have a bit of dimension to the doodles. I created dimension by sketching a heart nose with a taupe eyeliner. If any mistakes are made it can be easily cleaned with a bit of concealer. Tapping on the line with a ring finger to fade it out will also make it look like more of a pixels fading out around the main line.


In the middle of the taupe lines, I made a cleaner line using the dark brown eyeliner.


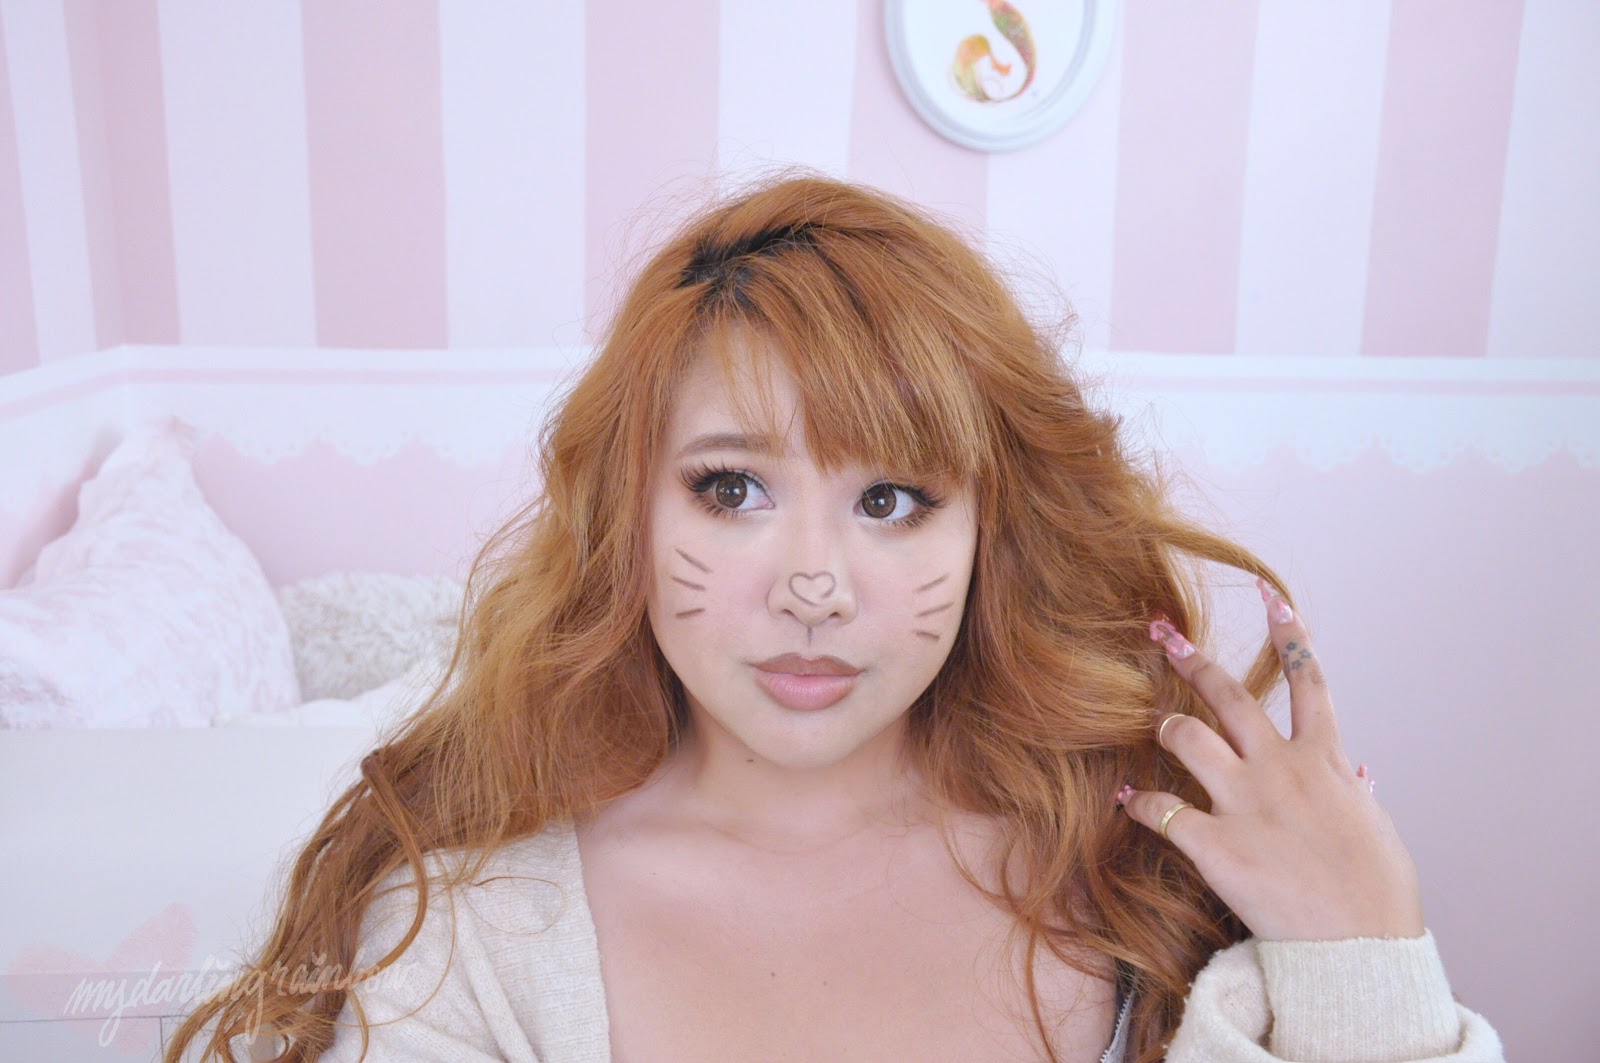
I repeated the same easy steps with the whiskers~ 


Then, done. I drew on ears, but the effect's there! For in person wear, wearing little cat ears would be just perfect!


For the Black Cat look, I applied it on top of the Brown Cat eyemake. The only difference is I darkened and smoked out the winged liner with a matte black eyeshadow.


For the Black Cat filter I repeated similar steps as with the Brown Cat look. I created a light rough sketch of a heart nose with a black eyeliner. Tapping the edges with a light touch of the ring finger, will create a base for the look of blurring out pixels.


Darken the center of the lines with a liquid or darker black eyeliner. I decided to go for another doodled cat filter like nose which came out quite adorable!! I repeated the same steps with whiskers on the cheeks.


I ended up really disliking the gradient look (I may have been copying a cat filter I liked haha) and decided to apply my favourite deep red lip gloss instead, which was a much better decision. I like the look of plump vampy lips a bit more.


Then, DONE! Also, added extra doodle effects because, why not~

Meow! I really loved how these came out, simple but extremely cute! Ah, I'm already getting ideas for next year's look!! 

<3CarisseIris

Sunday, June 3, 2012

Tutorial: My Current Makeup

 So, I'm going to show you what my current makeup routine is~
I start with a basic foundation routine, which consists of my Clinique BB cream, concealer and pressed powder.
I then use an assortment of neutral eye shadows.
I use a dark brown matte, a matte taupe colour, a vanilla matte shadow, a golden shimmer, a dark brown shimmer, a light gold shimmer and a bronze shimmer.
 You will also need a white eye pencil and a good liquid liner.
Don't forget some false lashes and mascara ~ I'm currently using Decolog Eyelashes Who's series in Dolly.
Not to mention a really pink blusher<3

SO, let's get started!
 Start with a nude eye with primer, if you have it.
 Going into the taupe matte, work it from the lash line to slightly above your natural crease.
 Then using the dark brown matte, fill in the space from your lash line to your natural crease, extending the outer corners.
 Taking the bronze shimmer, I apply it in a crescent shape on the outer  corner of my eye.
 Using the vanilla colour, I apply it under my brow and blend it down into the taupe and bronze shadows to blend them nicely. I then follow it with the golden shimmer applied just under the brow to make my eyebrow look more lifted.
 To start my under eye, I go into the dark brown shimmer and apply it in the shape of a comma, tapered in towards the middle of my eye and wider towards my outer eye. I always extend it past my eye to make my eyes look bigger.

 I then use my white pencil to fill in the space from my tear duct to just under my pupil to make my eyes look brighter and more youthful. On top of the white base, I gently press in the light golden shadow to really make it pop.
 I then carefully line my eyes with my liquid liner. I always taper the line and start it really thin and close to the lash when I start it towards the inner lid. then when I get to the outer lid I make the line thicker and wing it. If you're unsure how to wing your eyeliner, youtube has a vast assortment of tutorials on how to do so.
 I then coat my lower lashes in 3 or 4 coats of mascara and then apply false eyelashes to finish my eyes and to make them appear so much larger than they really are.
[Make sure that your eyeliner is even! I mine wasn't so I had to fix it on the computer...]
 Now for blush, I love pink blush because it makes me look more youthful. I smile and on the apples of your cheeks, in a circular motion, apply the blush. Not too much or you'll look like a clown, but enough for it to look like a light glow~
I finish off with a coat of lip balm on my lips and I'm done!
I hope you liked my tutorial on my current makeup look!
<3CarisseIris