Showing posts with label makeup. Show all posts

Sunday, October 21, 2018

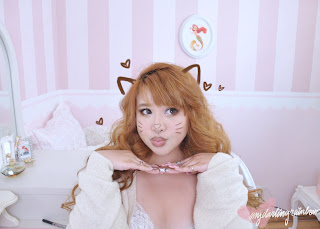
Cute Brown Cat +Sexy Black Cat Filter Makeup~


A few years back, right before I had my new set up, I did a cute and easy cat makeup for a quick last minute Halloween look which I absolutely adored!


I really wanted to repeat it again this year and also share a mini tutorial on how I put together the look.

Products needed for eyes:

Primer (for longevity of the look)
Eyeshadow in colours; cream, warm brown, dark brown, black (preferably matte)
Eyeliner of choice (I use liquid eyeliner in brown)

Products for cat filters:

Brown Cat; taupe eyeliner + dark brown eyeliner

Black Cat; black eyeliner + black liquid eyeliner
(optional dark lipstick or lip gloss)


To create a cat filter effect, I found it helps to have a bit of dimension to the doodles. I created dimension by sketching a heart nose with a taupe eyeliner. If any mistakes are made it can be easily cleaned with a bit of concealer. Tapping on the line with a ring finger to fade it out will also make it look like more of a pixels fading out around the main line.


In the middle of the taupe lines, I made a cleaner line using the dark brown eyeliner.


I repeated the same easy steps with the whiskers~ 


Then, done. I drew on ears, but the effect's there! For in person wear, wearing little cat ears would be just perfect!


For the Black Cat look, I applied it on top of the Brown Cat eyemake. The only difference is I darkened and smoked out the winged liner with a matte black eyeshadow.


For the Black Cat filter I repeated similar steps as with the Brown Cat look. I created a light rough sketch of a heart nose with a black eyeliner. Tapping the edges with a light touch of the ring finger, will create a base for the look of blurring out pixels.


Darken the center of the lines with a liquid or darker black eyeliner. I decided to go for another doodled cat filter like nose which came out quite adorable!! I repeated the same steps with whiskers on the cheeks.


I ended up really disliking the gradient look (I may have been copying a cat filter I liked haha) and decided to apply my favourite deep red lip gloss instead, which was a much better decision. I like the look of plump vampy lips a bit more.


Then, DONE! Also, added extra doodle effects because, why not~

Meow! I really loved how these came out, simple but extremely cute! Ah, I'm already getting ideas for next year's look!! 

<3CarisseIris

Sunday, September 23, 2018

Casual + Cute Glasses Makeup


I recently had to update my glasses prescription which meant I needed to get some new glasses.
So, I bought two new pairs from Tijn Eyewear (not sponsored), one with my new prescription and another pair that I use for school that has blue light protection since I use my tablet for note taking and homework. I recently have gotten a bit paranoid about blue light eye damage so I've been eyeing protective eye wear for awhile.

With wearing glasses everyday, I've had to modify my makeup to avoid some new annoying realities that come with constant eye wear.


The thing I like to avoid most is foundation or concealer getting smudged on the bottom edge of my glasses! It bothers my peripheral vision and it makes me feel sloppy.

So, to get around that I've completely nixed foundation and liquid concealer from my daily routine. Also, since I tend to start my day straight from the gym, I wear less makeup than I used too~ just enough to look rested and polished.


I always start the day off with clean and moisturized skin, since I forgo foundation, I want any visible skin to look as fresh as it can~


My next step is applying a pore minimizing primer that has UV protection. I like Hera's lavender primer as my skin has been getting quite tan and my concealers are now a bit pale for me, the lightly tinted primer helps to blend the colour of my makeup to my skin without extra coverage.


To help my under eyes look less sallow, I use Tatcha's Pearl Tinted Eye Illuminating Treatment, in Moonlight, to add some brightness back into my skin, not only does it add a bit of colour but it also helps to reduce discolouration and fine lines with prolonged use.


A small secret product I've constantly had in my life for the past 10 years is La Bella Donna's Loose Mineral Foundation,  in Nicoletta. La Bella Donna's mineral foundation was created and used for use in post facial surgery offices, safe to use on healing and sensitive skin. It also was created to cover healing and textured skin too~ I've usually kept a stash of this foundation for emergency days when I had horrible break outs. Recently though, I've been using it to spot conceal areas and to keep my skin looking makeup free but covering up areas of hyperpigmentation. 

Also, since it's a powder, any pigment that might be under my glasses don't get picked up by my frames, keeping my glasses looking clear and clean!


^With applied concealer and brows~


I also like my brows to be low maintenance, and smudge free. I've recently been using PMELtete's Tint Dual Eyebrow. The formula of the pen is similar to a stain and lasts all day! (I've accidentally got it on my hands before and it is a pain to try washing off completely). The pen has a brow gel on it's opposite end and it's pretty good... Not my favourite, but it does it's job. It's just conveniently there, and I can't complain.


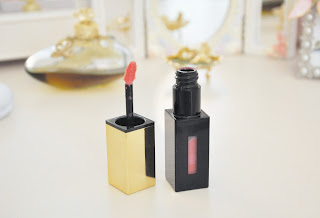
To finish off my makeup, I draw a very thin winged eyeliner with my favourite Jill Stuart liquid eyeliner in brown, and tap on some of my go to YSL Lip Stain, in 220 Nude Steam, on my cheeks and on my lips (it's the exact colour my cheeks flush after the gym so it looks amazingly natural on me!). Then finish off with a spritz of Tatcha's Luminous Dewy Skin mist, which helps to meld everything seamlessly into my skin and give me a believably real dewy finish that makes any makeup look like it is my real complexion.

If I want a bit more oomph, I tap a bit of YSL's Touche Eclat Glow Shot onto any high points on my face I want to emphasize.


A quick and simple look for every day~ and it only takes me a few minutes to do so I have more time for studying and getting tasks done!


With my prescription lenses, there's a polished and casual feel!


If I want to dress up the look more, I can easily add some light but eye catching additions.


Since I will be adding eyeshadow, I want to fully conceal my under eye bags. I keep going back to Hera's liquid concealer since it's the perfect in-between shade, close to my skin tone and slightly lighter to brighten up my under eyes.


For the sake of staying compact and simple, I am using my Jill Stuart Pajama Party palette. Also, because I always use the pink shade from this compact as it's the only pink that doesn't give me an allergic reaction. (I have a precious review on this palette here).


In addition, I absolutely adore Etude House's Wonder Fun Park pigment, and use it to make the look more sparkly.


I use the Jill Stuart palette on my crease, lash line and under eye. Then, I tap the Etude House pigment onto the center of my lid, and applied on the inner corners under my eye.

Admittedly, the look isn't for everyone, but I really love the simple and slightly distressed feeling this style of makeup gives. The look falls perfectly into step with the makeup the models I admire seem to wear on the daily. I may still be heavily influenced by Larme styles!


To finish off the eye looks, I use brown false bottom and top lashes.

The Romantic Minnie and Daisy series lashes from Shobi, that I love, now come in a brown shade! So, I have a ton in my collection now!

Brown false lashes, give the volume of false lashes, but give a softer look to the face. I absolutely adore how they give a glam yet youthful appearance, nothing too intense but still alluring!


I am also trying  new contour, Mochi Pact by 16 Brand~ It's something quite interesting, it's something in between a cream and a powder, the pouf it comes with has a soft mochi texture that feels great on the skin and leaves a thin film of the colour where applied.

I've been playing around with different types of contour since I've been leaving my skin looking bare~ so far this contour looks the best since it's so sheer and buildable. Plus, it doesn't leave any trace of product, only leaving behind a slight pigmentation so it lets my skin show though, keeping it looking natural.


I apply a bit of my YSL Tint-in-Balm to my lips, and the look is finished! 

A Soft cute natural look! 


Topped off with my blue light protection lenses, and the look is nicely complimented~ The touch of shimmer peeks through the lenses and my eyes can stand out past the unique frames.

I know the natural looks are very different from my usual makeup, but it's been fun to play around with what I can do with bare looking skin. Also, figuring out how to happily wear glasses after decades of resenting them has been it's own mini adventure!

Hope this week has been treating you kindly! It's been stressful for me, but I'm trying to take my stresses in stride and to learn from my mistakes and improve myself~ turning my negatives into some type of positive! Phew~ but, I'm very satisfied that I've been managing to keep up with my blogging!

<3CarisseIris !!


Tuesday, November 14, 2017

Urban Decay Naked Skin Glow, Cushion Foundation~ Review


 SO, if you haven't heard, Urban Decay released a cushion foundation!
(or at least in select countries in Asia as of right now, 2017) 


Those who may be familiar with my blog, I love my Urban Decay Naked foundation and have used it in most of my makeup tutorials~ So of course, I was absolutely thrilled when I read that Urban Decay was releasing this cushion option into their line! Especially, since as of recently, I've been quite a fan of cushion foundations.

The line comes equipped with a pretty sizable amount of shades (at least for an Asian cushion line). I believe there are 6 options in total for light to medium skin tones but all with varied undertones; olive, neutral, and ruddy~ I quite enjoy that they have the multiple options since most cushions tend to be more on the neutral side and sometimes cast as grey on me. The shade I chose was 2.75 which is a golden undertone light/medium shade in the line, which, for comparison, I am a 3.0 in Urban Decay's Naked Skin line. The undertone match is pretty close to mine and just a hair lighter in shade than my skin which isn't even noticeable since it does match my neck and chest.

According to the packaging, the product boasts that it will deliver a flawless and luminous 'naked glow' that is buildable and will keep skin hydrated for 18++ hours with the addition of a SPF 50+ PA+++.  It also contains added skin benefits like most other cushion foundations including; Rose centifolia extract, for toning and firming, Gentian root extract, the provides skin soothing, and peppermint extract, which conditions the skin. 

I do have a slight grievance, in that one must purchase the compact and the refill, separately, in order to make a complete set, which is a bit frustrating since the cost does add up. I paid roughly $20 for the compact and $40 for the foundation itself not adding shipping/shopping service fee. I do own more expensive cushions but I guess I feel less taken advantage of since those come as a complete set with refills usually available for purchase direct from the brands.


The packaging  on the compact is a beautiful iridescent cover which looks amazing on my vanity and a metallic lavender case. The pouf is decent... Nothing special about it, I don't find it amazing and I could easily interchange it with say my Etude House pouf and I wouldn't be able to tell a difference with application. I do like the closure of the cushion since I can feel it lock into place and I'm not just applying a ton of pressure onto my cover to ensure I have a solid seal on my foundation so it wont dry out.


Taking a look at the cushion, it's actually my first air/mesh style in my collection which is a change. In all honesty, I don't quite get the mesh style cushion but from what I do understand, it helps control the amount of product used and apparently is more sanitary? Regardless, it seems to work just the same as my normal cushions. The constancy of the foundation isn't that runny, if anything I'd almost describe it as a gel or jelly texture and when applied feels a bit tacky. The formula has no strong scent which is nice, but I do tend to enjoy when cushion foundations smell medicinal or herbal but the lack of a scent isn't a make or break issue with me.


Application of the formula is where the problems become quite apparent. Above, is a photo of just the foundation itself. 

So the foundation starts off okay on the first pounce, but once I started blending it into my skin, it would stick to any uneven surfaces which I have quite a few such as excema spots and I was having a couple breakouts this time of month too. Also, a bit of an overshare, but I did pick at a spot ( or 2) and the application of foundation on the scab was HORRENDOUS, the foundation caked into my fine lines and any small crevices on my face and just sunk into my pores and made them look even more noticeable.

Besides the textured skin issue, I found that it could barely cover my hyperpigmentation spots nor give any semblance of an even skin tone. I tend to have sallow skin near the corners of my lips and under my eyes and all my foundations have been able to even them out but not with this one!

The foundation says buildable but I found that it 'built up' and accentuated the patchiness, and even started to look a bit chalky. By the time I decided to just let it rest, the ending result left my skin in a state of disarray! Even the dry down texture was so sticky and made my skin feel so oily, which is quite odd because I have normal/combo skin that doesn't ever tend to feel immediately greasy upon initial foundation application. Moreso, the end result was quite matte which belied the sensation on my skin.

To salvage the look of my skin, it became a test on how much work my concealer could do. Then to make my skin feel less gummy I set my makeup with translucent powder which I don't usually tend to do with cushion foundations because the main point of them, or at least the reason why I prefer them, is to retain a natural dewy sheen to my skin. So, the point to even wearing this foundation was moot.

If I were to say a positive, it did even out the colour of my skin, if anything. Any redness I had was covered, so if anyone has super clear and smooth skin and only had issues of red spots of slight discolourations, maybe it could work for them..


I  really do have to share this photo immediately after the initial application photo. This was taken 4 hours after I finished my makeup and all I did was shoot this review, put away my lighting, and do some laundry. So, nothing too strenuous nor anything that would make me sweat excessively. Again, I'm not even excessively oily, but the foundation separated so extremely and so quickly! I've never ever had a foundation do that and I've put many of my foundations though the test though spin classes, hot yoga, going swimming and I've had a few patches but never such a noticeable break down of the formula on my skin. Even with setting powder and even my Ben Nye setting spray which I've used on stage/musical performances, though gym sessions and even to waterproof my makeup it couldn't even hold this together, which is maybe even a bit amazing. Really though, my skin looked and felt so oily and caked that I couldn't stand it.


I actually gave this foundation a chance! I used it for a whole week, and just barely pushed it by only wearing it for maybe an hour or two while out each time. So, shooting this tutorial was the longest I have warn it during a day. First day I used it was for dinner on my birthday and even just approaching my mum in low natural light she remarked on how bad my foundation looked, 'You're trying a new foundation aren't you, it looks horrible!' was pretty much an exact quote from her. Even my friend said it looked a bit patchy when I asked her opinion.

I mean, even with my lightly edited shots and from afar in the above pictures, you can see texture a pretty uneven finish with dark sallow patches!


Never have I given such a scathing review on my blog, but it's hard to give even a neutral opinion when I absolutely loathed a product as much as this, which is a shame because of all the makeup products that debuted this year this was the one I was so excited about and one I bullheadedly went out of my way to obtain as soon as I could after it's launch. So, it was quite disheartening that it failed in all aspects for me.

Would I recommend the foundation? Not unless one had almost perfect skin, or if someone wants to blow their money to just add it to their makeup collection. Otherwise, I'd say to stay clear of it.

Hopefully if it does release state-side, here in the US, they will fix the formula, but as it stands, two thumbs WAY down on this foundation.

<3CarisseIris


Monday, October 2, 2017

Doe Eyed Vixen~ Tutorial


So, sometime this summer I figured out a way to erase years off my face, and make heavy makeup look less intense. The result ended up looking somewhere in between innocent and a bit sultry..


Main products I used:

Etude House, Personal Color Palette, Warm Tone Eyes
Jill Stuart duo, 107, In Love with Love
PeriPera Ink Color Cara Mascara, in Dry Rose
YSL Touche Eclat Glow Shot, Sunset
YSL Glossy Stain, 220
YSL Volupte Tint-in-Oil, Love Me Nude 11


The most used and loved palette I have right now is my Etude House Warm palette~ it's good mix of sheer shades that are build-able and easily blend-able! It's not very suited for those who don't like sheer/natural eye shadows that tend to be found in a good amount of Asian cosmetics, but I find I enjoy the look of them a lot! It fits the soft, romantic, effortless, eye look I want to have.

The shades used are:

W1, Honey Milk - matte warm taupe
W6, Spangle - chunky glitter beige
W8, Dull Espresso - matte deep brown
W11, Toasted Pecan - matte peach taupe
W13, Cream Tea - cream shimmer


The main focus of the look is the eyes~  The look is a large and rounded 'doe' eye, but with a sultrier appeal to them. 

I started with a clean lid, and primed my eyes with the cream shadow of the Jill Stuart duo.

1. Crease: Taking 'W1', the lightest contour colour, blend it in a windshield motion along the eyelid crease. This will serve as a way deepen the depth of the eyes and as a way to create a more seamless and blended eye.


2. Inner + outer corner: Using a mid tone matte first, for me that was 'W11', and blend a bit of shadow onto the inner eye lid and outer crease to further deepen the contours of the eyes. This will create a rounder eye shape. If you want to enhance this shape even more and amp up the sultriness, take a deep brown shade, 'W8', and blend the deeper colour onto the outer corner of the eyelid. 

3. Eyelid: I take an eye shadow that is lighter than my skin tone and will catch the light nicely 'W6' and load it onto my fingertip [usually my ring finder of my non-dominant hand, as it's the most gentle finger to use around the eyes] and tap it right into the center of my eyelid. This serves a a highlight to further the perspective of an rounder eye shape and really deepen the contours created in the steps prior.

4. Lash line:  Using the deep brown eye shadow, 'W8', and a smaller brush or applicator, smudge the shade along the lash line to give the appearance of natural shadows from your eyelashes and to create the look of a thicker lash line and to add a smokiness to the look.

5. Eye bag: Instead of smoking out the lower lash line I used the middle shade contour shadow, 'W11' to again intensify the 'doe eye' look. I blend the shadow along the natural crease under the eye. This will add the illusion of larger eyes by adding a few millimeters to the eye area not to mention giving more space vertically on the face to the eye area. 


6. Under eye: I use a light shimmer, 'W13', to finish off the eye shadow portion of the look. It adds a  3D volume to the lower lash line to make the contour look more believable. It also makes the eyes look a bit puffier which gives a fragility to the look.


The next trick is lightening the lashes. It sounds a bit counter productive, but it is the highlight to the look and what actually captures peoples attention (especially in person), and lessens the heaviness of the eye makeup.
The shade I chose is the shade of my hair colour/ lighter than my natural lashes.


To further bring the look together and make the lashes look cohesive, I use the mascara to line my lashes. I use an angled eyeliner brush and use the mascara like a gel liner to give myself a very straight winged eyeliner, lacking the classic flick of a cat eye.


Like all my looks, I add top and bottom lashes! Ill be 100% real, I don't love these lashes at all but they were the only light brown shade top and bottom lashes that I found locally and looked pretty decent. I would probably recommend looking around on Amazon or eBay for nicer ones.

You could probably get a similar look by  very carefully prepping and colouring normal (black) false lashes with the coloured mascara.


It's hard to show the true colour of the lashes, so here's a photo from my phone in direct sunlight.

I finish everything up with a bit of YSL Glossy Stain, 220 to the apples of my cheeks and my lips for a natural flush of colour, a touch of YSL Touche Eclat Glow Shot on the high points of my cheeks for a slight glow, and YSL Volupte Tint-in-Oil to serve as a lip gloss.

Then, that's it!


A very contradictory look. Or what I like to envision it as an innocent look with a mysterious undercurrent~

<3CarisseIris