

I've been seeing so many drop dead gorgeous hairstyles on my instagram feed this season and I couldn't get them out of my head! The main accounts I've been obsessing over in regards to hair are Swankiss_official♥ and okumura.yusuke


Ever since I figured out how to do the heart hair arrangement I wanted to learn how to replicate my favourite Larme hairstyles. So, I recruited my friend, self titled, 'Braidcognito', who is absolutely amazing at duplicating hairstyles from photos, to help teach me how to do so!
Most of the styles I like do incorporate braids (mostly French braids) so, learning the basics of that would be recommended for the following hair arrangements.
Basic breakdown of a French braid is it's an overhand braid that incorporates hair from either side into the main braid structure. I don't think I'm equipped to properly and cohesively explain how to French braid... In all honesty I'm still quite a novice at braiding. So, I HIGHLY recommend watching french braid tutorials online if it is something new to be attempted!!!

The first look is one of the more easier, beginner friendly, styles and quicker in terms of completing, but definitely looks quite striking.

Items needed:
1 hair tie
Ribbons (I have clip on ribbons which make the styling quite quick and easy)

2. Start braid at the part, on the side with the largest mass of hair.
3. Continue with a regular French braid going straight down.
4. Once hitting brow level, stop pulling in hair into the braid and continue as a normal braid.
5. Tie off braid.
6. Gently pull strands of the braid, evenly, to create more volume and a beautiful thick plait.
7. Clip, pin, or tie bows into the braid to add more personality!

This style is one I have been able to successfully recreate without much stress even with my beginner skills at French braiding and definitely recommend attempting for any skill level! It's also very flattering because it doesn't take away volume or height to the hair and makes the face look small.

The next style is an easier take on the above hairstyle, but that showcases how to make the heart arrangement~

Items needed:
5 hair ties
Ribbons (again, I use clip on bows for quick and easy placement)

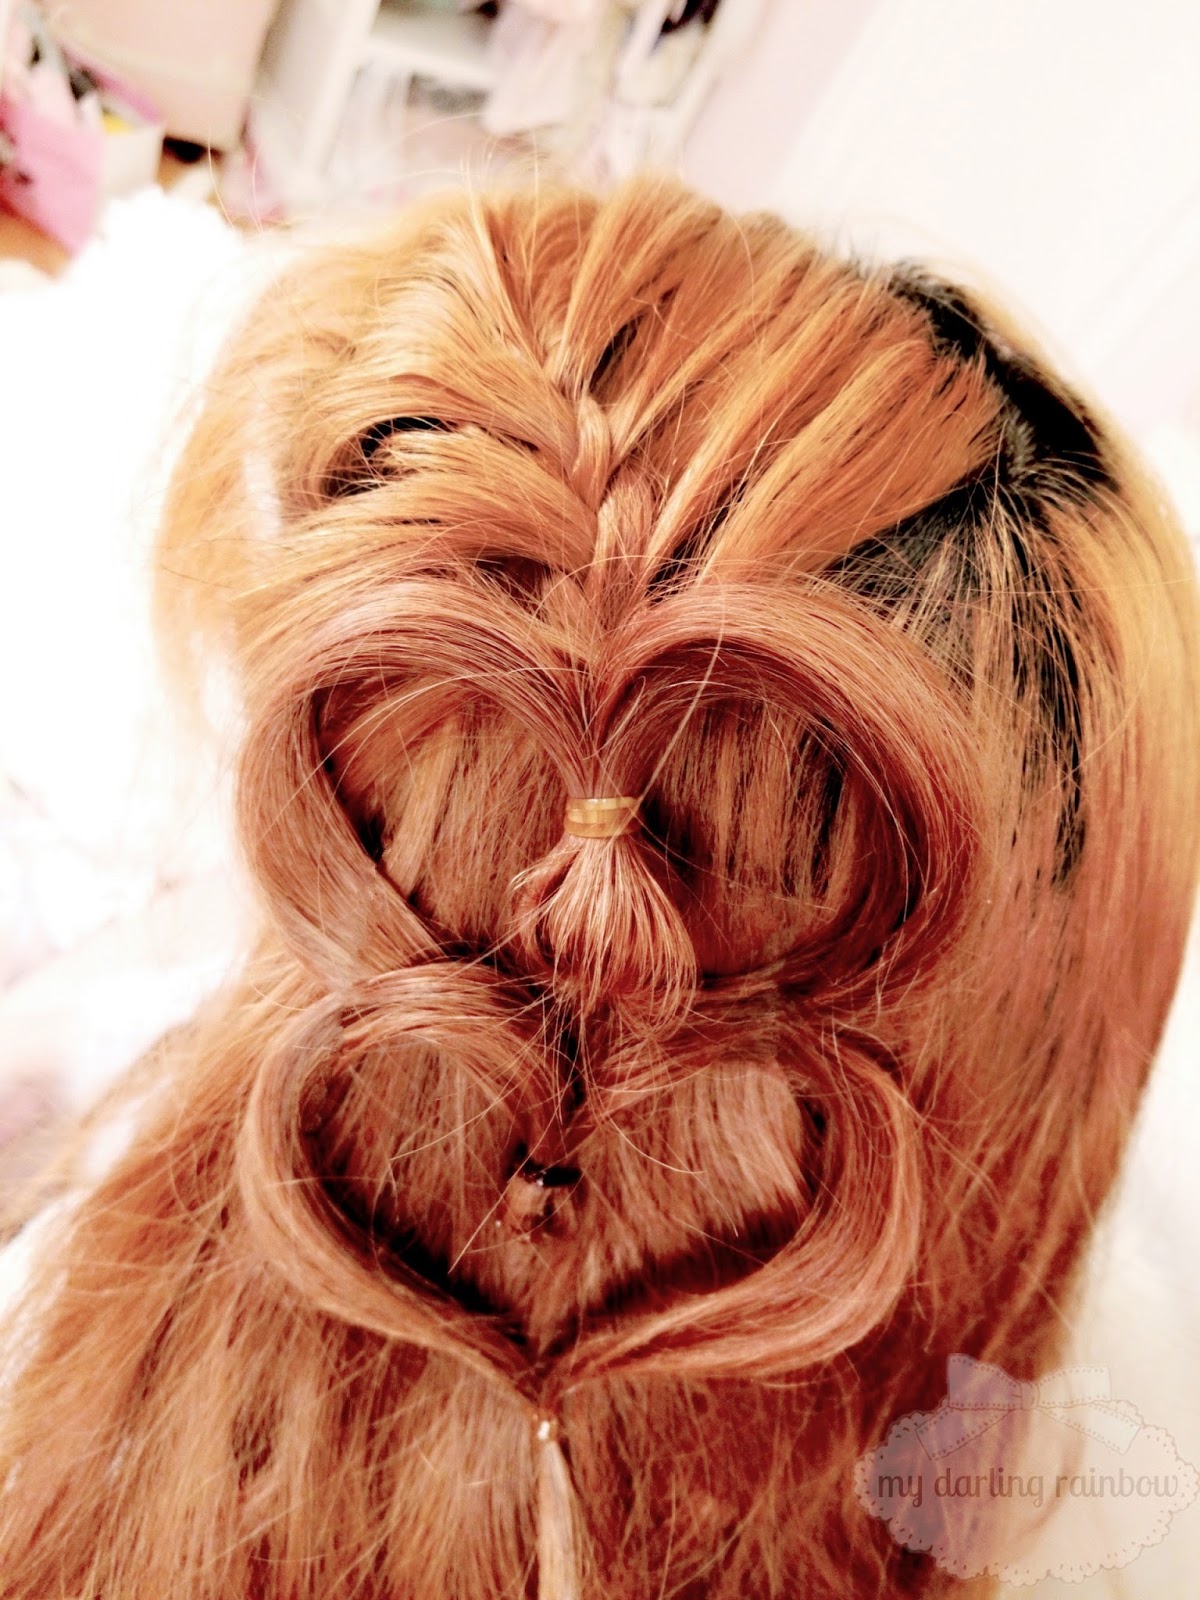
Above, I created an easy break down on hair hearts~
The first step is to tie off the section of hair you are using. Once tied, separate the ends into two pieces.
Secondly, using another hair elastic, tie up the end hair so it is forced upward. It is the best time to fix and neaten up the pieces. Optionally, you can use a hair straightener to guide the hair and even give it more of an arch to aid the heart shape.
The last step is to tie off the ends and finish the heart!
It does take a bit of practice, but with a bit of fine tuning it is definitely do-able.


1. Like the previous look, part hair into a deep side part~
Finish and tie the braid after 3-4 inches.
3. With the tied off hair, create a hair heart (previously diagrammed)
4. Repeat and make a second heart with remaining hair.
5. Finish by clipping, pinning or tying ribbons on the middle nubs of the hearts.

Heart hair arrange is hands down the cutest hair style to come out this year! Since it can be adjusted for almost every hair length and can be added anywhere on the head, it's just so versatile~

The last look I wanted to feature or at least attempt to break down is one of Okumura's signature arrangements because it's just so whimsical and over the top!

Items needed:
7 hair ties
LOTS of ribbon!
Specifically for me:
4 ribbons each measuring 10 inches
3 ribbons all measuring 6 inches
1. Part hair where preferred, I parted mine down the middle~
2. Start one braid on one side towards the middle of the head.

3. Use a Dutch braid (similar to French brain but bringing the hair under rather than over) with only pulling in hair from one side, specifically, the side towards the top of the head.
4. Continue the braid diagonally and secure with a hair tie.
5. Repeat on other side of the head and secure both braids together with a tie when finished.
6. Start another Dutch braid towards the front of the head, again only pulling hair from one side, like the previous braid, pulling hair from the area above the braid.
7. Continue braid diagonally down and secure with a hair tie.
8. Repeat on other side; secure braid with a hair tie. Both braids are to remain separate.

9. Using same method as previously mentioned to make hair heart arrangement, create a heart with the connected braids.

10. Use the 10 inch ribbons to thread through the two braids on each side like shoelaces. Each side braid set used 2 of the long ribbons, each ribbon starting at opposite ends and meeting to tie into a ribbon in the middle.

11. To finish, tie, clip or pin ribbons at the end of each outer braid and at the bottom of the heart

PHEW! It's definitely a process to create, but the end product is so intricate and amazing! I could definitely justify using more ribbons to amp up the 'WOW' factor. Also, with all the skills used to make the each step could be used and applied separately or in different ways to make infinite amounts of unique hair arrangements~
This season I've definitely been inspired to step out of my comfort zone and attempt to style my hair more often! Which makes me so grateful to my friend, 'Braidcognito', for taking the time to figure out how to remake these hairstyles and guiding me in how to do it myself. Also, for agreeing to let me borrow her talents to share on my blog.
Hopefully we were able to decently break down the steps to be easy to follow and that they will be attempted and enjoyed!
<3CarisseIris
Aaaaaaaamazing
ReplyDeleteAaa thank youu ♡♡♡♡♡
DeleteThese hairstyles are so gorgeous and this tutorial is very helpful! I'll definitely be trying this out~ Thank you ♡
ReplyDeletei have instantly fallen in love with these hairstyles! definitely will be trying them out!!!
ReplyDelete