Showing posts with label hair. Show all posts

Sunday, September 16, 2018

Mini Doughnut Hair~ Twin Buns Tutorial~


So, maybe a year ago, my friend was sleeping over and we got really into the anime Please tell me Galko-chan, and as a joke midway though watching the series, I quickly figured out how to recreate Galko's hair and surprised my friend with a small in person demonstration of how easy her hairstyle is to wear.

Well, I ended up falling in love with how cute and extremely easy the mini doughnnut hair is to do, after that, and have been wearing it quite often this past year!

The way to wear mini donuts, is so quick and simple that I felt a small pictorial would be the most convenient way to explain how to recreate the look.


Items needed:
2 socks (I used some thin ankle socks)
Comb, to part hair cleanly

Optional:
Alligator clips, for hair separation
Curler


The first step is to make a sock doughnut~ easily done by cutting off the toe of the sock and rolling it into a doughnut.

The smaller the sock, the more petite the buns are. I personally like thin fabric ankle socks because the buns come out cute and compact. Larger, thicker socks will make buns that look large and plump, like a big fluffy yeast doughnut.


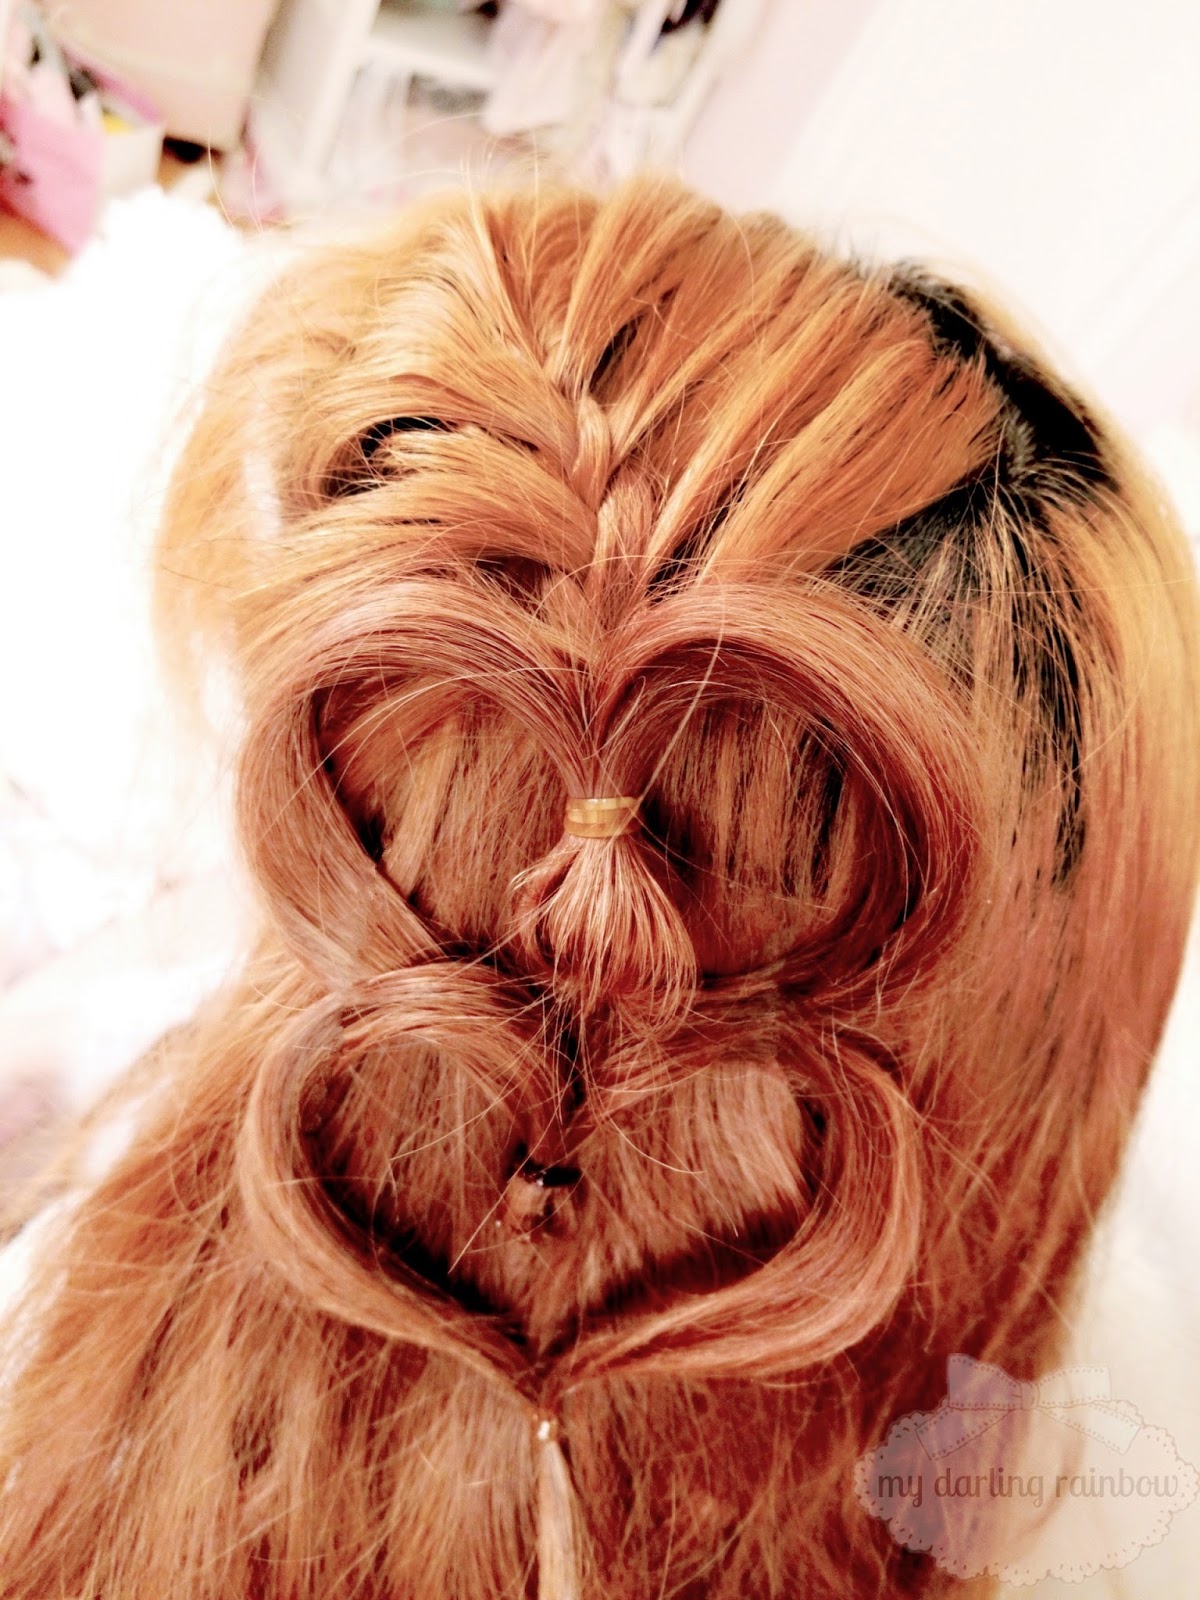
So, to start, separate the top 1/3 of hair, roughly an inch above the ear line.
To keep the hair easily organized, I like to use alligator clips but tying the bottom section of hair into an elastic is just as convenient too. 

Next, split the top section of hair down the middle and arrange the face framing pieces of hair as desired.

Taking one side of the parted area, pull hair though one sock roll.

Slowly and neatly working from the end of the hair down, tuck the hair over the sock roll and start rolling the doughnut down the hair. Making sure to keep the hair evenly spaced and keeping the rolling process neat will make the bun look cleaner AND will keep extra frustration at bay when it comes time to fixing up the doughnuts after.

After completing the roll, pull and fluff out any hairs where necessary to make the doughnut look nice and round.

Repeat the process on the second section of hair.

Then finally, style the rest of the hair as desired. I personally love how the doughnuts look perched on loose waves.

Some practice might be necessary (especially with long hair), but after getting the hang of it, the hair style is so quick to master!

I love wearing mini doughnut hair when I'm in a rush for classes but still want to look like I put in effort to look good, or days I just want to look cute and playful, but the most common scenario for me is when I have slightly dirty hair that needs to sorted out.

For fans of Galko-chan, or those who might get frustrated with trying to make even doughnuts, the style even  looks cute with one side doughnut-ed and the other section put into a ponytail.


So, from your local, off an on again gaijin-gyaru, I hope that this pictorial was helpful and that rocking mini doughnut hair might become something fun and new for my readers to try out, maybe come to love as I have!

Maybe if I ever have more time to watch cartoons, I can find more 2d hair inspiration to showcase here too? I'll have to wait till winter break for that though;;

<3CarisseIris

Tuesday, December 19, 2017

Cardcaptor Sakura Hairdryer~ Review


Earlier this summer I purchased the Cardcaptor hairdryer by Super Groupies, which is a Japanese company that specializes in making anime fashion merchandise like luggage, high heels and also hairdryers.

I have never really needed a hairdryer since I tend to air dry my hair, but this summer I had multiple times I washed my hair a bit to late and was mourning the fact that I didn’t own one. Also, I was styling my Halloween wig and needed a hairdryer to set some pieces, so it was the perfect time to look into purchasing one.


While looking around I saw that there was a Cardcaptor hairdryer now on the market, so I contacted a  Japanese buyer to purchase one for me. [as of writing this blog post I’ve found multiple sellers online and on eBay but there’s also a huge influx of knock offs so purchase with your own discretion] 

The hairdryer came as one complete piece packed nicely in a cute themed box. It has the ability to fold in half into a compact size for storage or travel. As a whole, it’s incredibly sturdy and well structured. The wings feel very secure on the unit, with no flex. The hairdryer’s head, though clear, has no issues with overheating and is also firmly attached to the casing. Which I did honestly have slight doubts about for some reason, but thankfully those doubts were unfounded.


The hairdryer has 3 settings; Cool, Haircare, and Quick Dry. Cool and Haircare both operate on a medium air pressure while Quick dry has the faster air speed. Cool, as it implies, is just cool air which is what I use for my own hair and I’ve had no issues with additional hair damage. Haircare is a low heat setting at 50 °C that I’ve actually used for multiple things like helping to dry some paint, for different art projects, and most recently my Succubus horns! The Quick dry setting is the highest heat setting at 60 °C with the addition of a faster air speed, which I’ve only used on my wig project to help melt the plastic hairs a bit to set the style. It really works wonderfully for every task I’ve used it for. Which makes it a nice basic hairdryer. No over heating, easy to control and operate, and a nice air flow.


The details of the hairdryer are really the biggest draw to the unit and the reason I decided to purchase it. I may not be that vocal about it but I adore Cardcaptor Sakura, it was one of the shows I grew up watching so I definitely look back on it fondly and enjoy the aesthetic of it’s merchandise. The attention to the details and contours of the hairdryer is really quite lovely in person. The main pink colour is a nice semi matte pink and the head has beautiful metallic detailing. The bottom of the hairdryer also has a slight gem like connection to the plug, which needs 100 V 50/60 Hz and can fit into a standard US plug. 

Is it the best hairdryer on the market, I highly doubt it, but it does what it’s intended to do. So, it is what it is. A nice good hairdryer with a cool, low and high setting. The main advantage is that it’s so cute and definity a nice addition for someone that may enjoy the Cardcaptors aesthetic as much as I do. I definitely feel like a magical girl when I pull it out of my hairtools drawer, hehe!

Do you own any niche merchandise? Its actually my first time purchasing something not Disney related but I have such a soft spot for nostalgia related items!

<3CarisseIris

Monday, November 27, 2017

3 Larme Ribbon Hairstyles~ Tutorial


 I've been seeing so many drop dead gorgeous hairstyles on my instagram feed this season and I couldn't get them out of my head! The main accounts I've been obsessing over in regards to hair are Swankiss_official and okumura.yusuke


Ever since I figured out how to do the heart hair arrangement I wanted to learn how to replicate my favourite Larme hairstyles. So, I recruited my friend, self titled, 'Braidcognito', who is absolutely amazing at duplicating hairstyles from photos, to help teach me how to do so! 

Most of the styles I like do incorporate braids (mostly French braids) so, learning the basics of that would be recommended for the following hair arrangements.

Basic breakdown of a French braid  is it's an overhand braid that incorporates hair from either side into the main braid structure. I don't think I'm equipped to properly and cohesively explain how to French braid... In all honesty I'm still quite a novice at braiding. So, I HIGHLY recommend watching french braid tutorials online if it is something new to be attempted!!!


The first look is one of the more easier, beginner friendly, styles and quicker in terms of completing, but definitely looks quite striking. 


Items needed: 
1 hair tie
Ribbons (I have clip on ribbons which make the styling quite quick and easy)


1.Part hair into a deep part.

2. Start braid at the part, on the side with the largest mass of hair.

3. Continue with a regular French braid going straight down.

4. Once hitting brow level, stop pulling in hair into the braid and continue as a normal braid.

5. Tie off braid.

6. Gently pull strands of the braid, evenly, to create more volume and a beautiful thick plait.

7. Clip, pin, or tie bows into the braid to add more personality!


This style is one I have been able to successfully recreate without much stress even with my beginner skills at French braiding and definitely recommend attempting for any skill level! It's also very flattering because it doesn't take away volume or height to the hair and makes the face look small.


The next style is an easier take on the above hairstyle, but that showcases how to make the heart arrangement~


Items needed:
5 hair ties
Ribbons (again, I use clip on bows for quick and easy placement)

Above, I created an easy break down on hair hearts~

The first step is to tie off the section of hair you are using. Once tied, separate the ends into two pieces.

Secondly, using another hair elastic, tie up the end hair so it is forced upward. It is the best time to fix and neaten up the pieces. Optionally, you can use a hair straightener to guide the hair and even give it more of an arch to aid the heart shape.  

The last step is to tie off the ends and finish the heart!

It does take a bit of practice, but with a bit of fine tuning it is definitely do-able.


1. Like the previous look, part hair into a deep side part~

2. Start braid at top of head and start a normal French braid on the side of the head with the most hair.
Finish and tie the braid after 3-4 inches.

3. With the tied off hair, create a hair heart (previously diagrammed)

4. Repeat and make a second heart with remaining hair.


5. Finish by clipping, pinning or tying ribbons on the middle nubs of the hearts.


Heart hair arrange is hands down the cutest hair style to come out this year! Since it can be adjusted for almost every hair length and can be added anywhere on the head, it's just so versatile~


The last look I wanted to feature or at least attempt to break down is one of Okumura's signature arrangements because it's just so whimsical and over the top! 


Items needed:
7 hair ties
LOTS of ribbon!

Specifically for me:
4 ribbons each measuring 10 inches
3 ribbons all measuring 6 inches

1. Part hair where preferred, I parted mine down the middle~

2. Start one braid on one side towards the middle of the head.
3. Use a Dutch braid (similar to French brain but bringing the hair under rather than over) with only pulling in hair from one side, specifically, the side towards the top of the head. 

4. Continue the braid diagonally and secure with a hair tie.

5. Repeat on other side of the head and secure both braids together with a tie when finished.

6. Start another Dutch braid towards the front of the head, again only pulling hair from one side, like the previous braid, pulling hair from the area above the braid.

7. Continue braid diagonally down and secure with a hair tie.

8. Repeat on other side; secure braid with a hair tie. Both braids are to remain separate.
9. Using same method as previously mentioned to make hair heart arrangement, create a heart with the connected braids.
10. Use the 10 inch ribbons to thread through the two braids on each side like shoelaces. Each side braid set used 2 of the long ribbons, each ribbon starting at opposite ends and meeting to tie into a ribbon in the middle.

11. To finish, tie, clip or pin ribbons at the end of each outer braid and at the bottom of the heart


PHEW! It's definitely a process to create, but the end product is so intricate and amazing! I could definitely justify using more ribbons to amp up the 'WOW' factor. Also, with all the skills used to make the each step could be used and applied separately or in different ways to make infinite amounts of unique hair arrangements~ 

This season I've definitely been inspired to step out of my comfort zone and attempt to style my hair more often! Which makes me so grateful to my friend, 'Braidcognito', for taking the time to figure out how to remake these hairstyles and guiding me in how to do it myself. Also, for agreeing to let me borrow her talents to share on my blog.

Hopefully we were able to decently break down the steps to be easy to follow and that they will be attempted and enjoyed!

<3CarisseIris

Wednesday, July 1, 2015

Hot Heads Extensions, Review

 Well, I finally went and took that step to have long hair 24/7. Above is my before and after using Hot Heads extensions!
^^ My Dirty Looks extensions in 26" inches.
To those who may not know, I've been wearing clip on Dirty Looks extensions for over two years. The one thing, is that since I've been on a fitness kick, and all my hair washing, the whole upkeep and staying matched to my extensions, clipping them on and off and styling has been pretty annoying. Now with summer weather being so hot and all too, I can't even bring myself to clip on the blanket of hair. 

Now that I have a stylist I trust with my hair, I asked her about a more permanent solution, and she told me about Hot Heads. 

Now, I've had a history trying out different types of extensions. 
I've tried tape extensions like 8 years ago, and I hated them, especially because they were so thick and long and the grow out was horrible, and we had to use tape and heat to bond it, and I honestly wouldn't do it again. I've also tried keratin bonded extensions where you basically glue individual hairs  to the root of your hair to add thickness and length, and that shed like crazy for me, and you can't reuse the hair you buy. So, def not doing that again. And obviously the one extension type that I loved and stuck with were clip ins.

So, when my stylist told me that Hot Heads were a type of tape in extension, I was REALLY antsy, but she was like, no, the tape is really thin, no heat is required, and the wefts are like 1" inch and a half so grow out won't be annoying and you will barely feel them! So, after I did my $200 USD down payment, I waited a week for the hair to ship in and we were good to go.

Okay, so let's break down the pricing at my salon and what it goes to~

So, the $200 down payment was to order the hair, which is 20 inches in length [6" inches shorter than my regular extensions, great for this hot weather] and I used two packs, so $100 a pack I'm assuming?  The hair is real human hair with cuticles in tact and going in the same direction, so it lays flat and can be reused. Each pack has twenty 1 1/2 inch tapes that have the hair attached.
Which means that one pack will make 10 complete wefts, since the tape sandwiches one piece of hair, like the picture on the right. 

Since my hair is on the thin side and relatively long, I only needed two packs, or 20 complete wefts to fill out my hair for length and retrain a good blend into my natural hair.

The remaining $450 I paid the day of application, with that price comes application, dye job, trim, and styling. Application, like my stylist said, used no heat~ She just parted my hair where needed, worked in small sections and sandwiched those pieces on the separated sections of hair. She worked meticulously to keep my hair looking balanced and blended. The application process only took 45 minutes.

So, that day we stopped there. Since, my hair is a very custom colour, Hot Heads didn't have a matching hair shade. Which,by the way, they have an AMAZING selection of colours and hair textures, from blondes to blacks, dark roots to ombres, vivid purples, blues and reds to even a new selection of pastels, they even had my old pastel pink hair colour as an available hair shade!


But, back on track, pun intended, since we needed to colour the extensions to blend, we scheduled for me to come in in 3 days, so the tapes could bond, since you're not supposed to wet the tapes for at least 48 hours to make sure they're securely bonded together. So, after that, I went in to touch up my hair colour and get the extensions dyed along with it. She also helped to teach me how I should wash my hair and to also use products that are sulfate free, because sulfates can break down the bond of the tapes. By the way, the extensions blended even better, didn't know that was possible, and felt more natural after being washed. I then had my fringe trimmed since I didn't want to layer the hair or take of any length, and then styles by my stylist, which was wen the top photo was taken.
This is how the weft looks, it's actually barely visible and blends really well with my hair. I can also style my hair however I please, even throw it into a high pony tail for the gym or even french braid my hair without any issue~ I can also run my hand over my hair and though my hair and not feel the wefts, which is pretty nice. It's also very light, with minimal sheddding. 

I didn't think there'd be such a different feeling between my clip in hair and this hair but there definitely is! While my clip ins felt like this sticky blanket when I was sweaty or it was hot/humid, this hair didn't feel like that at all, it just felt like normal hair and didn't feel as uncomfortable. I wasn't expecting that kind of relief or that that 'blanket' feeling would go away, but I was ecstatic that this hair differed from my clip ins in that way... Which also made me kind of question the quality of my past extensions, though I loved them, cause this is really how real human hair should feel.


The Hot Heads extensions don't need to be moved up for 2-3 months depending how fast your hair grows and can be reused 2-4 times, so they have a year life span, which is great! It kind of helped to make my decision because The Dirty Looks Extensions are just over $200 USD and I have to replace them every 6 months, on the dot~ So, even though the Hot Heads were a bit of an investment, in the long run it's just a bit more than what I've already been spending on my hair...

It's been almost 2 weeks since I had them installed, and I absolutely love my extensions, and am so glad I took that step and got them done.

<3CarisseIris

Monday, June 8, 2015

Three Super Simple and Elegant Hairstyles

While reading my Spring Issue of Larme Magazine, I noticed a lot of hair styles incorporating this one easy tuck element to a simple pony tail to create elegant and textured hair styles that give a new twist to old staple hair styles. I've actually used this technique before last year, but it's been a pretty well used styling technique in magazines this year, but even more so for spring and summer hair styles.

The first look will be a new take on twin tails/ pig tails.
You will need 4 elastic hair ties.
Optional, 2 ribbons.
 To start this this look, part your hair down the middle and create the first pony tail where you prefer. I like my pony tails to look relaxed and more mature, so I let them sit low. For a younger and fresher appearance, you can wear the tails higher on your head.
 Once you have the pony tail where you want, part the hair above the elastic to create a hole.
You will pull the pony tail up, and through the part and tuck it though.
Simple as that.
 After pulling it though, your hair should look like above.
 Pull another elastic a few inches under your first one. Then, parting the hair in between the two elastics, again, pull the remaining pony tail up, and though that part in your hair to tuck the hair though, creating the style above.

Then, repeat to the other side.

You can finish off the look with some ribbons to conceal the bottom elastic band.

Now, you've seen the method of tucking your pony tails, we'll be doing the same thing but with two other different hair styles

The next is a half up/half down hair style.
You will need 3 hair elastics.
Optional, 1 ribbon.
 Start with a loose ponytail using a small section of hair on top of your head.
I made a small diagram of the section parts of hair you will be using. The first pony tail should be using hair from the first section.

 After you have the first pony tail, part the hair above the hair elastic, and bring the remaining hair in the pony tail up and though the parted hair to tuck it though. It should look like the picture above.

 Using hair in the 2nd section, you can avoid the hair and section directly under your first pony tail. Bring the hair together around the first pony tail.
This step is easier since the hair is already parted.
Just bring the hair in the remaining pony tail up and over the hair elastic, tucking it.
 Then, using the third section, again you can avoid the previously used sections of hair, and create a third pony tail above your last pony tail.
Again, since the hair is parted, bring the remaining pony tail up, over, the elastic tie.

And, easy as 1,2,3, the hair style is done!
You can then add a ribbon at the bottom of the last pony tail.


Then, it's done. The hair style is actually my favourite, it looks so textured and effortlessly pretty and has so much volume.

The third style is a textured pony tail.
You will only need 2 hair elastics this time.
Optional, 1 ribbon.
 To start this look, you will start with your hair parted half way, and create a pony tail with the top half o hair.
Then, using the same tucking technique like the past looks, tuck the pony tail though.
 Then, gather your hair in a pony tail. I pulled my hair into a side pony tail because I like to have my hair handing in front of my body and it looks very sweet. You can easily pull the hair into a normal pony tail, to keep your hair out of your face and to keep you feeling fresher.
After you have all  your hair in the elastic, part the hair above the hair tie like before, and pull the remaining pony tail up and through, to tuck it neatly.
You can finish by tying a ribbon at the end if you feel like it.

The look is a sweet and yet voluminous pony tail with some added texture to give the pony tail some personality.

These three styles, though are simple basics, are given some new flair with the addition of one simple technique. They're a fun new way to wear your hair when the weather starts getting warmer and can really dress up a look.

<3CarisseIris