Showing posts with label gyaru. Show all posts

Sunday, October 21, 2018

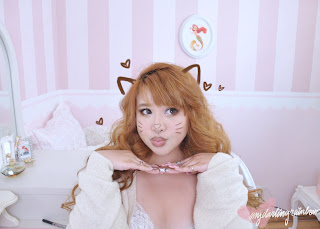
Cute Brown Cat +Sexy Black Cat Filter Makeup~


A few years back, right before I had my new set up, I did a cute and easy cat makeup for a quick last minute Halloween look which I absolutely adored!


I really wanted to repeat it again this year and also share a mini tutorial on how I put together the look.

Products needed for eyes:

Primer (for longevity of the look)
Eyeshadow in colours; cream, warm brown, dark brown, black (preferably matte)
Eyeliner of choice (I use liquid eyeliner in brown)

Products for cat filters:

Brown Cat; taupe eyeliner + dark brown eyeliner

Black Cat; black eyeliner + black liquid eyeliner
(optional dark lipstick or lip gloss)


To create a cat filter effect, I found it helps to have a bit of dimension to the doodles. I created dimension by sketching a heart nose with a taupe eyeliner. If any mistakes are made it can be easily cleaned with a bit of concealer. Tapping on the line with a ring finger to fade it out will also make it look like more of a pixels fading out around the main line.


In the middle of the taupe lines, I made a cleaner line using the dark brown eyeliner.


I repeated the same easy steps with the whiskers~ 


Then, done. I drew on ears, but the effect's there! For in person wear, wearing little cat ears would be just perfect!


For the Black Cat look, I applied it on top of the Brown Cat eyemake. The only difference is I darkened and smoked out the winged liner with a matte black eyeshadow.


For the Black Cat filter I repeated similar steps as with the Brown Cat look. I created a light rough sketch of a heart nose with a black eyeliner. Tapping the edges with a light touch of the ring finger, will create a base for the look of blurring out pixels.


Darken the center of the lines with a liquid or darker black eyeliner. I decided to go for another doodled cat filter like nose which came out quite adorable!! I repeated the same steps with whiskers on the cheeks.


I ended up really disliking the gradient look (I may have been copying a cat filter I liked haha) and decided to apply my favourite deep red lip gloss instead, which was a much better decision. I like the look of plump vampy lips a bit more.


Then, DONE! Also, added extra doodle effects because, why not~

Meow! I really loved how these came out, simple but extremely cute! Ah, I'm already getting ideas for next year's look!! 

<3CarisseIris

Saturday, July 21, 2018

Hello Summer, Hello New Car!


Perfectly timed for summer, my old/ first car decided to give out on me so I finally got the chance to car hunt and find my perfect new ride. Once finding my new baby, I figured it was finally time to have a bit of fun and decorate it. My car has always been the transportation of choice when it comes to road trips and heading out with friends so I happily justified the pink takeover of my vehicle.


Starting from the front, the first item I bought to keep my hands from burning on the steering wheel was a pink steering wheel cover, which has a pliable leather feel and adds texture for my grip. I also have a faux sheepskin seat cover so that I don’t burn my legs on my seat and so that my bare legs don’t stick to the chair, since I only seem to wear miniskirts. 

The main, and most striking decor in my car is my pink car seat covers from SeeMeHappy on Amazon. They were quite kind and double checked for me that they would fit my car, and answered any questions I had regarding them. The installation was a bit tricky, but with some maneuvering and selective tucking, they fit my car perfectly and look so sweet in my ride. The car seats also come with ribbon pillows and neck rests (my friends seem to adore the neck rests and say it makes car seats much more comfortable). The front seat covers also have convenient pockets in front which I tend to store my phone and keys. 


In my backseat I decided to add in some throw pillows, since two of my friends tend to fall asleep in the backseat whenever we go on trips, but when I have more than one passenger in the back, I can easily store them in the trunk or bring them into the house.


In the back, I also have tsurikawa, or train handles. When I used to be more involved and obsessed with gyaru, I saw one photo with some girls with similar ones dangling from their vehicles years ago and knew I wanted a set in my car one day. I bought mine of eBay. Googling the origin, it seems that having these on one’s vehicle represents rebellion, since people would steal them off trains and show them off on their bikes or cars. 


In the back of my car, I also store a few extra amenities and extra gadgets. 


Behind the drivers seat, I have two bag holders, one for me and a passenger if they would like to use it. It makes keeping my bag in place and within reach quite convenient. 

My car does have cup holders for the back seat, but the process to open it is a bit annoying and it takes up space, so I decided to install a simple cup holder that attaches to the back air port for easier accessibility. 

Some of the additional items I have stored in the back is an emergency light and knife, which my mum gifted me and a low profile anti-theft device that has an additional feature that can break open a car window in an emergency. 


I also decided to switch out my car’s original floor mats for a fun matching set, I bought these cute marble and pink floor mats from Zazzle, and they come with front and back mats that seem to be universally sized.


I thought a peek into my trunk would be fun to include, so far I seem to take along spare umbrellas, gym gear and my gym bag, a spare shopping tote, and a ton of board games along with me. I’m pretty much prepared for any occasion and at any time.


I don’t have much in terms of outside decor on my car, but I did decide to put a subtle decal on my window. I bought a ‘second star to the right’ decal, inspired by Peter Pan from EverlyAfterStudio on Etsy. The decal is actually iridescent and appears pink, blue or yellow depending on the light and looks quite impressive on my car. 


The final accessory is a bit hidden, and it serves as a nod to the name that I chose for my car. My car is an ‘eco’ car, and conserves gas by turning off the engine whenever I sit on the break for longer than a few seconds. When I release the break the car seems to reluctantly wake up and turn on the engine before moving forward. Its actions made me keep referring to it as a cat being forced  to wake up and yet insisting to nap in odd and sometimes precarious spots. So, I lovingly chose the name Muta, from the Ghibli film, ‘The Cat Returns’. I found a perfect enamel pin from VectorPenguin on etsy that perfectly represented how I see my car and makes me happy to see it whenever I open my sun visor. 


I believe that was a fitting introduction to my new portable pink wonderland. (Also, as a way to share where I purchased the items I have.) 

I promise I’ll try to keep a regular update schedule, at least to the best of my abilities, haha!

<3CarisseIris

Monday, October 2, 2017

Doe Eyed Vixen~ Tutorial


So, sometime this summer I figured out a way to erase years off my face, and make heavy makeup look less intense. The result ended up looking somewhere in between innocent and a bit sultry..


Main products I used:

Etude House, Personal Color Palette, Warm Tone Eyes
Jill Stuart duo, 107, In Love with Love
PeriPera Ink Color Cara Mascara, in Dry Rose
YSL Touche Eclat Glow Shot, Sunset
YSL Glossy Stain, 220
YSL Volupte Tint-in-Oil, Love Me Nude 11


The most used and loved palette I have right now is my Etude House Warm palette~ it's good mix of sheer shades that are build-able and easily blend-able! It's not very suited for those who don't like sheer/natural eye shadows that tend to be found in a good amount of Asian cosmetics, but I find I enjoy the look of them a lot! It fits the soft, romantic, effortless, eye look I want to have.

The shades used are:

W1, Honey Milk - matte warm taupe
W6, Spangle - chunky glitter beige
W8, Dull Espresso - matte deep brown
W11, Toasted Pecan - matte peach taupe
W13, Cream Tea - cream shimmer


The main focus of the look is the eyes~  The look is a large and rounded 'doe' eye, but with a sultrier appeal to them. 

I started with a clean lid, and primed my eyes with the cream shadow of the Jill Stuart duo.

1. Crease: Taking 'W1', the lightest contour colour, blend it in a windshield motion along the eyelid crease. This will serve as a way deepen the depth of the eyes and as a way to create a more seamless and blended eye.


2. Inner + outer corner: Using a mid tone matte first, for me that was 'W11', and blend a bit of shadow onto the inner eye lid and outer crease to further deepen the contours of the eyes. This will create a rounder eye shape. If you want to enhance this shape even more and amp up the sultriness, take a deep brown shade, 'W8', and blend the deeper colour onto the outer corner of the eyelid. 

3. Eyelid: I take an eye shadow that is lighter than my skin tone and will catch the light nicely 'W6' and load it onto my fingertip [usually my ring finder of my non-dominant hand, as it's the most gentle finger to use around the eyes] and tap it right into the center of my eyelid. This serves a a highlight to further the perspective of an rounder eye shape and really deepen the contours created in the steps prior.

4. Lash line:  Using the deep brown eye shadow, 'W8', and a smaller brush or applicator, smudge the shade along the lash line to give the appearance of natural shadows from your eyelashes and to create the look of a thicker lash line and to add a smokiness to the look.

5. Eye bag: Instead of smoking out the lower lash line I used the middle shade contour shadow, 'W11' to again intensify the 'doe eye' look. I blend the shadow along the natural crease under the eye. This will add the illusion of larger eyes by adding a few millimeters to the eye area not to mention giving more space vertically on the face to the eye area. 


6. Under eye: I use a light shimmer, 'W13', to finish off the eye shadow portion of the look. It adds a  3D volume to the lower lash line to make the contour look more believable. It also makes the eyes look a bit puffier which gives a fragility to the look.


The next trick is lightening the lashes. It sounds a bit counter productive, but it is the highlight to the look and what actually captures peoples attention (especially in person), and lessens the heaviness of the eye makeup.
The shade I chose is the shade of my hair colour/ lighter than my natural lashes.


To further bring the look together and make the lashes look cohesive, I use the mascara to line my lashes. I use an angled eyeliner brush and use the mascara like a gel liner to give myself a very straight winged eyeliner, lacking the classic flick of a cat eye.


Like all my looks, I add top and bottom lashes! Ill be 100% real, I don't love these lashes at all but they were the only light brown shade top and bottom lashes that I found locally and looked pretty decent. I would probably recommend looking around on Amazon or eBay for nicer ones.

You could probably get a similar look by  very carefully prepping and colouring normal (black) false lashes with the coloured mascara.


It's hard to show the true colour of the lashes, so here's a photo from my phone in direct sunlight.

I finish everything up with a bit of YSL Glossy Stain, 220 to the apples of my cheeks and my lips for a natural flush of colour, a touch of YSL Touche Eclat Glow Shot on the high points of my cheeks for a slight glow, and YSL Volupte Tint-in-Oil to serve as a lip gloss.

Then, that's it!


A very contradictory look. Or what I like to envision it as an innocent look with a mysterious undercurrent~

<3CarisseIris

Monday, June 8, 2015

Three Super Simple and Elegant Hairstyles

While reading my Spring Issue of Larme Magazine, I noticed a lot of hair styles incorporating this one easy tuck element to a simple pony tail to create elegant and textured hair styles that give a new twist to old staple hair styles. I've actually used this technique before last year, but it's been a pretty well used styling technique in magazines this year, but even more so for spring and summer hair styles.

The first look will be a new take on twin tails/ pig tails.
You will need 4 elastic hair ties.
Optional, 2 ribbons.
 To start this this look, part your hair down the middle and create the first pony tail where you prefer. I like my pony tails to look relaxed and more mature, so I let them sit low. For a younger and fresher appearance, you can wear the tails higher on your head.
 Once you have the pony tail where you want, part the hair above the elastic to create a hole.
You will pull the pony tail up, and through the part and tuck it though.
Simple as that.
 After pulling it though, your hair should look like above.
 Pull another elastic a few inches under your first one. Then, parting the hair in between the two elastics, again, pull the remaining pony tail up, and though that part in your hair to tuck the hair though, creating the style above.

Then, repeat to the other side.

You can finish off the look with some ribbons to conceal the bottom elastic band.

Now, you've seen the method of tucking your pony tails, we'll be doing the same thing but with two other different hair styles

The next is a half up/half down hair style.
You will need 3 hair elastics.
Optional, 1 ribbon.
 Start with a loose ponytail using a small section of hair on top of your head.
I made a small diagram of the section parts of hair you will be using. The first pony tail should be using hair from the first section.

 After you have the first pony tail, part the hair above the hair elastic, and bring the remaining hair in the pony tail up and though the parted hair to tuck it though. It should look like the picture above.

 Using hair in the 2nd section, you can avoid the hair and section directly under your first pony tail. Bring the hair together around the first pony tail.
This step is easier since the hair is already parted.
Just bring the hair in the remaining pony tail up and over the hair elastic, tucking it.
 Then, using the third section, again you can avoid the previously used sections of hair, and create a third pony tail above your last pony tail.
Again, since the hair is parted, bring the remaining pony tail up, over, the elastic tie.

And, easy as 1,2,3, the hair style is done!
You can then add a ribbon at the bottom of the last pony tail.


Then, it's done. The hair style is actually my favourite, it looks so textured and effortlessly pretty and has so much volume.

The third style is a textured pony tail.
You will only need 2 hair elastics this time.
Optional, 1 ribbon.
 To start this look, you will start with your hair parted half way, and create a pony tail with the top half o hair.
Then, using the same tucking technique like the past looks, tuck the pony tail though.
 Then, gather your hair in a pony tail. I pulled my hair into a side pony tail because I like to have my hair handing in front of my body and it looks very sweet. You can easily pull the hair into a normal pony tail, to keep your hair out of your face and to keep you feeling fresher.
After you have all  your hair in the elastic, part the hair above the hair tie like before, and pull the remaining pony tail up and through, to tuck it neatly.
You can finish by tying a ribbon at the end if you feel like it.

The look is a sweet and yet voluminous pony tail with some added texture to give the pony tail some personality.

These three styles, though are simple basics, are given some new flair with the addition of one simple technique. They're a fun new way to wear your hair when the weather starts getting warmer and can really dress up a look.

<3CarisseIris